First Login
Overview
This guide walks you through your first login to Vapor and essential initial configuration steps to secure and customize your installation.
Accessing Vapor
Step 1: Open Vapor in Your Browser
Navigate to your Vapor installation:
http://your-server-ip:8080Replace your-server-ip with your server's actual IP address or hostname.
Step 2: Login Screen
You'll be greeted with the Vapor login screen:
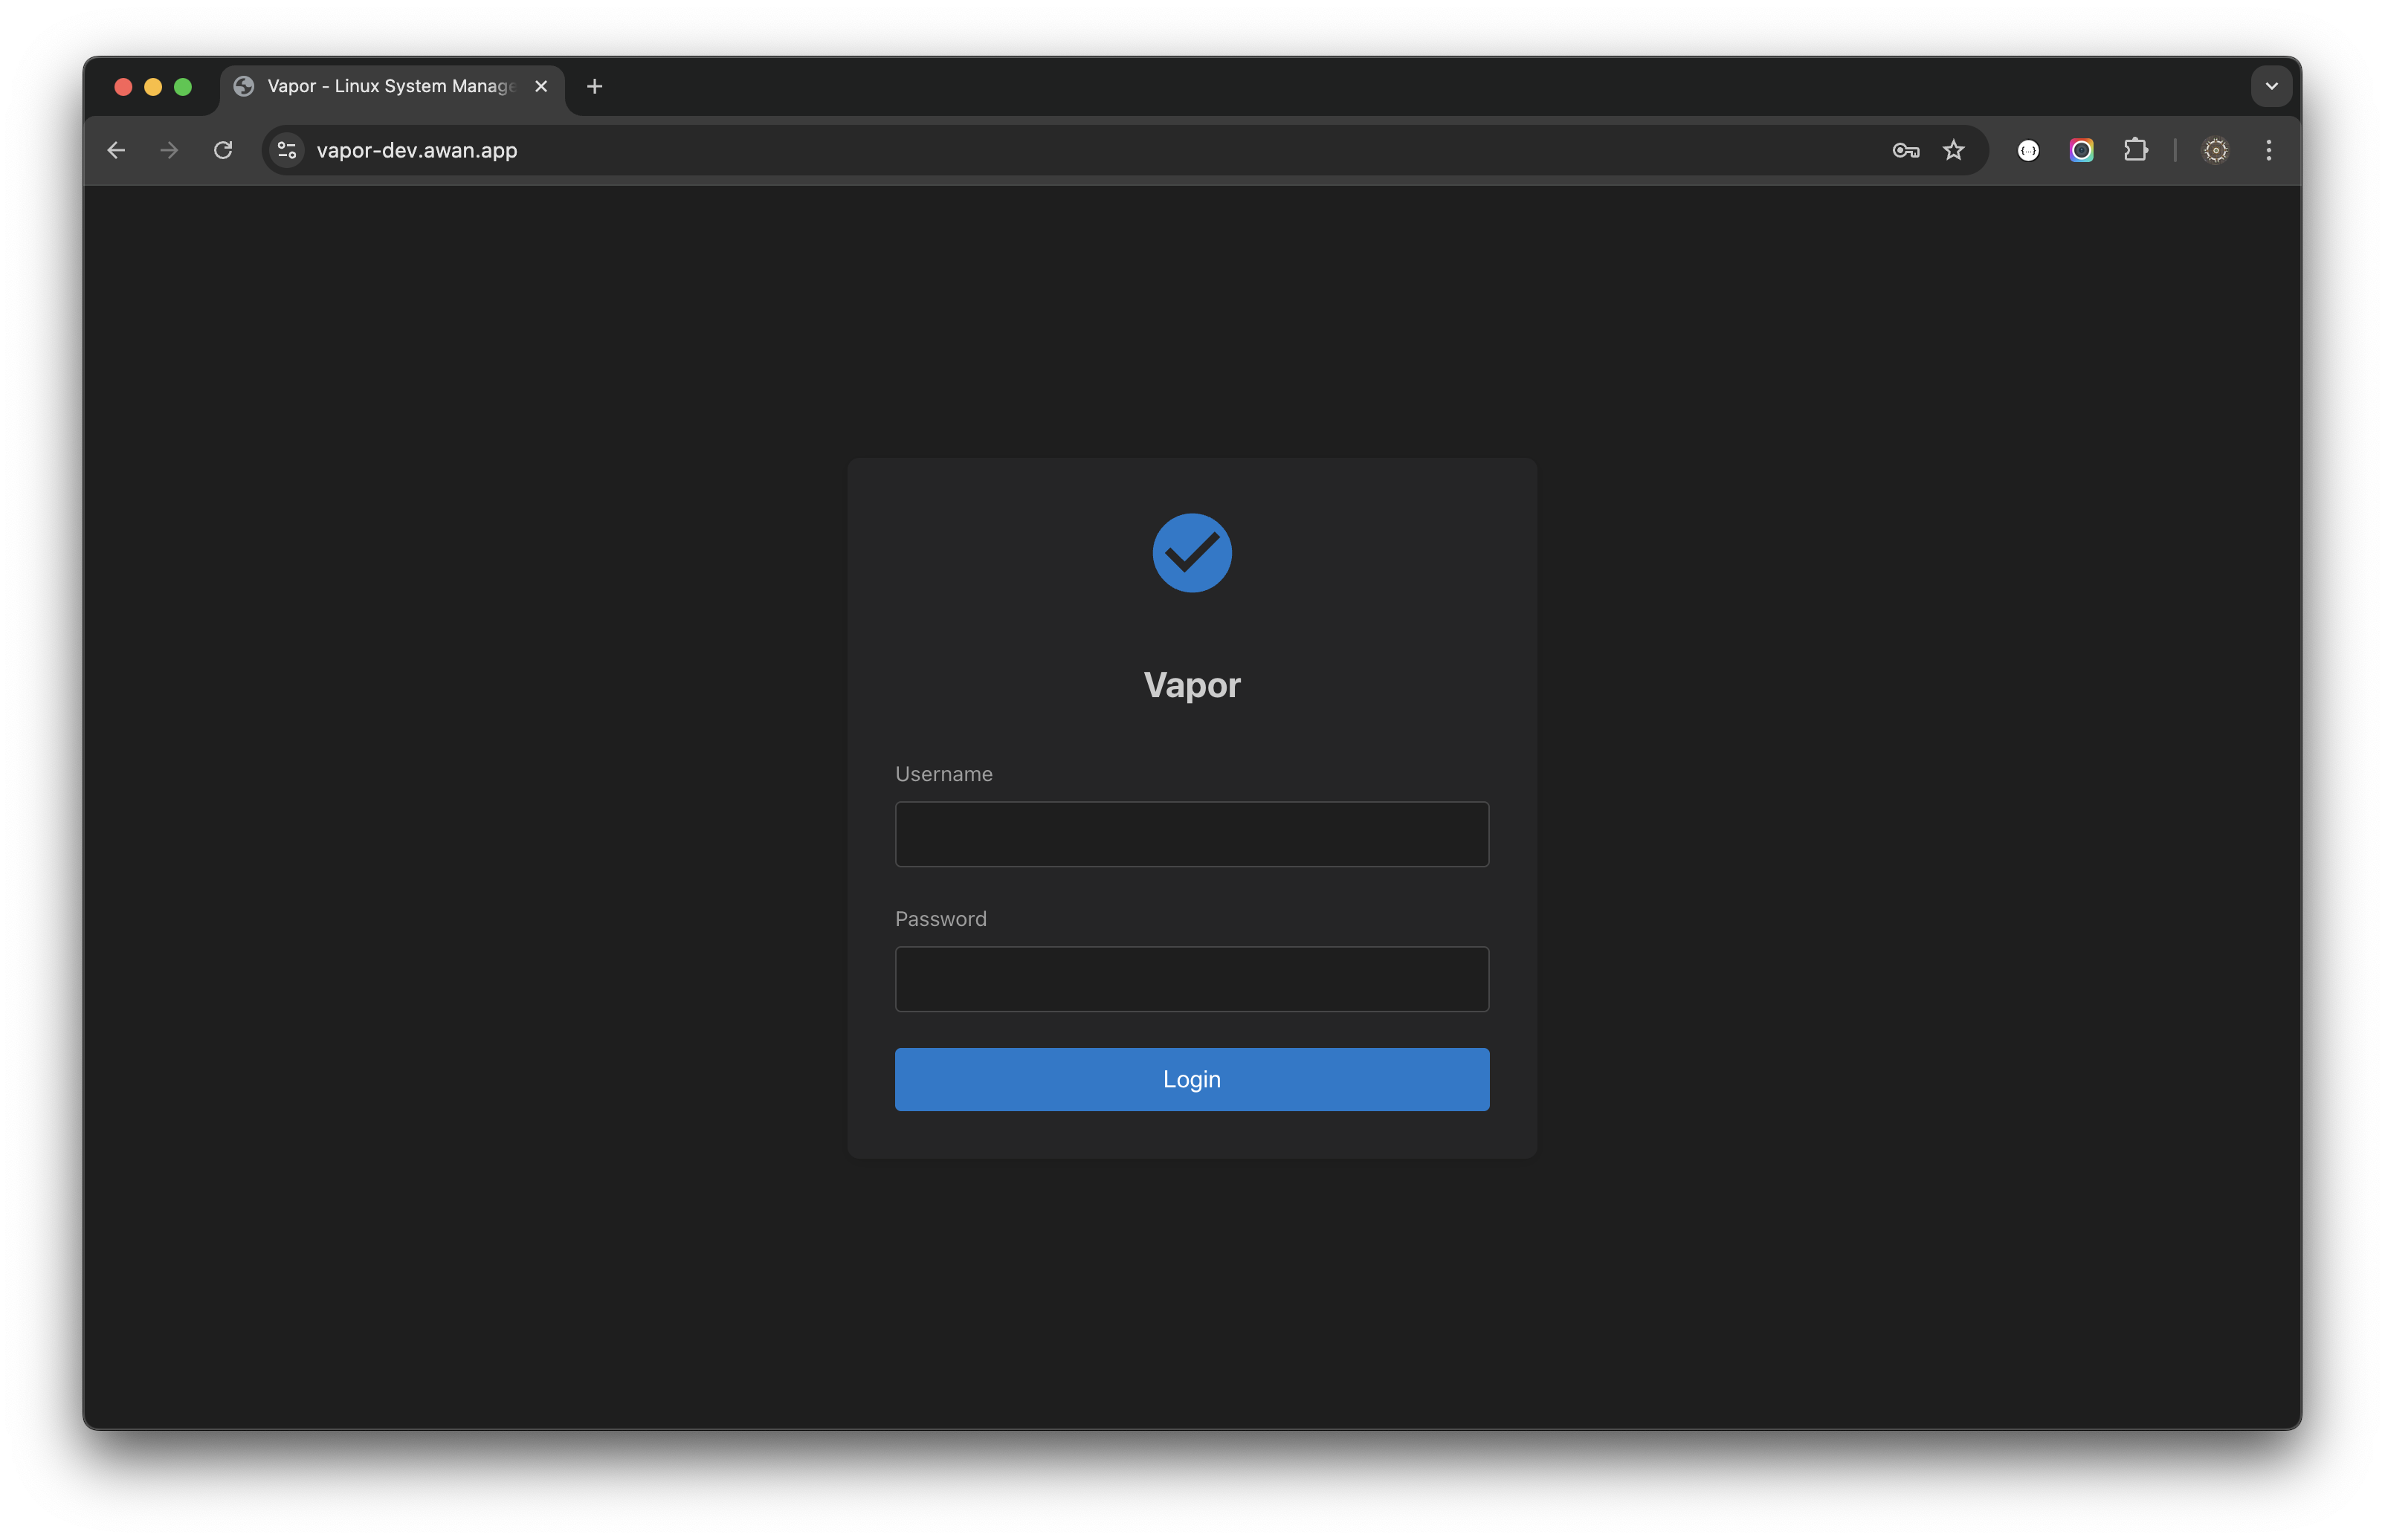
The login screen features:
- Clean, modern interface with Vapor logo
- Username and password fields
- Blue "Login" button
- Dark theme by default
Login Credentials
Vapor uses your Linux system credentials for authentication:
- Username: Your Linux username
- Password: Your Linux password
The system authenticates against /etc/passwd and /etc/shadow.
Login Process
Step 1: Enter Credentials
- Enter your username
- Enter your password
- Click the "Login" button or press Enter
Step 2: Handle Login Errors
If login fails, you'll see an error message:
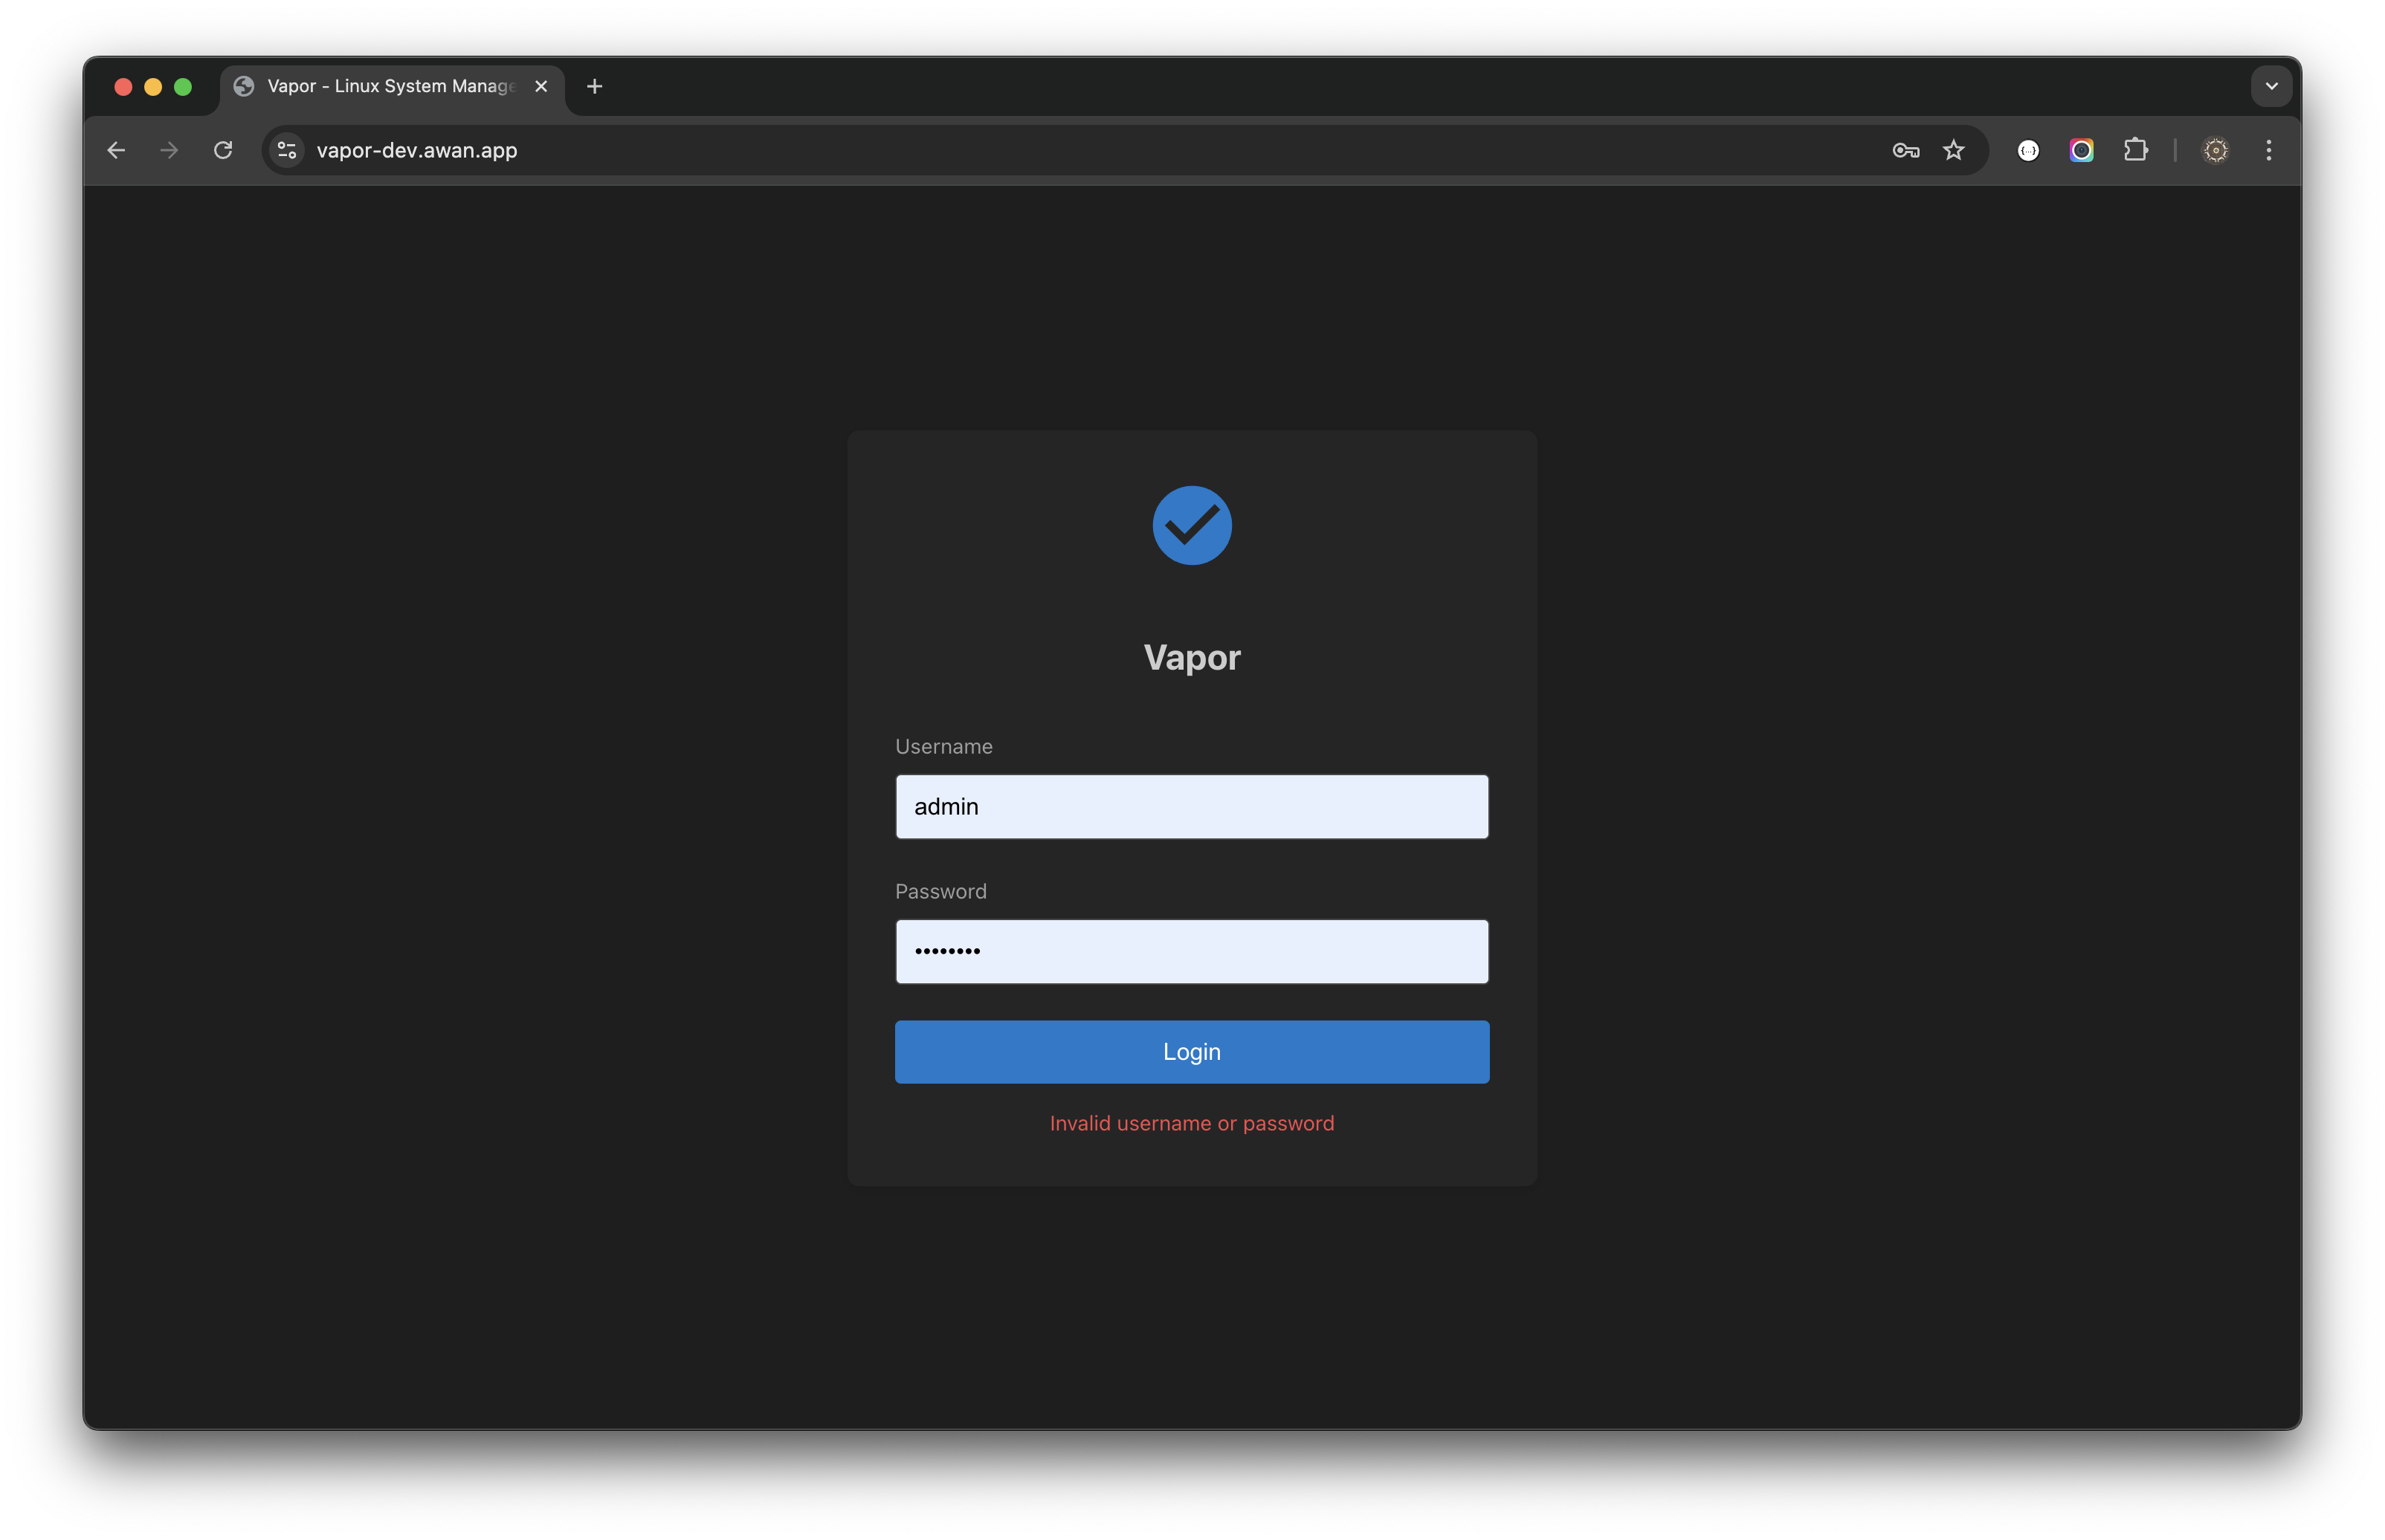
Common error reasons:
- Incorrect username or password
- Account locked or disabled
- Service not running properly
- Network connectivity issues
Step 3: Successful Login
Upon successful authentication:
- JWT token is generated and stored
- You're redirected to the dashboard
- Session begins with configurable timeout
Initial Configuration
1. Set Strong Passwords
Ensure all user accounts have strong passwords:
- Navigate to Users in the sidebar
- Review all user accounts
- Click Edit → Change Password for any weak passwords
- Enter a strong password
- Save changes
2. Configure JWT Secret
For production security, set a strong JWT secret:
# Generate a secure secret
openssl rand -base64 64

# Update configuration
sudo nano /etc/vapor/environment
Add or update:
JWT_SECRET=your-generated-secret-hereRestart Vapor:
sudo systemctl restart vapor3. Set Session Timeout
Configure session duration for security:
- Access system settings
- Set appropriate timeout (recommended: 8-24 hours)
- Enable "Remember Me" option if desired
4. Configure User Preferences
Customize your experience:
Theme Selection
- Click the 🌓 icon in the top bar
- Choose between dark and light themes
- Theme preference is saved per user
Language Selection
- Click the 🌐 icon in the top bar
- Select English or Bahasa Indonesia
- Interface updates immediately
Understanding the Interface
After login, you'll see the main interface:
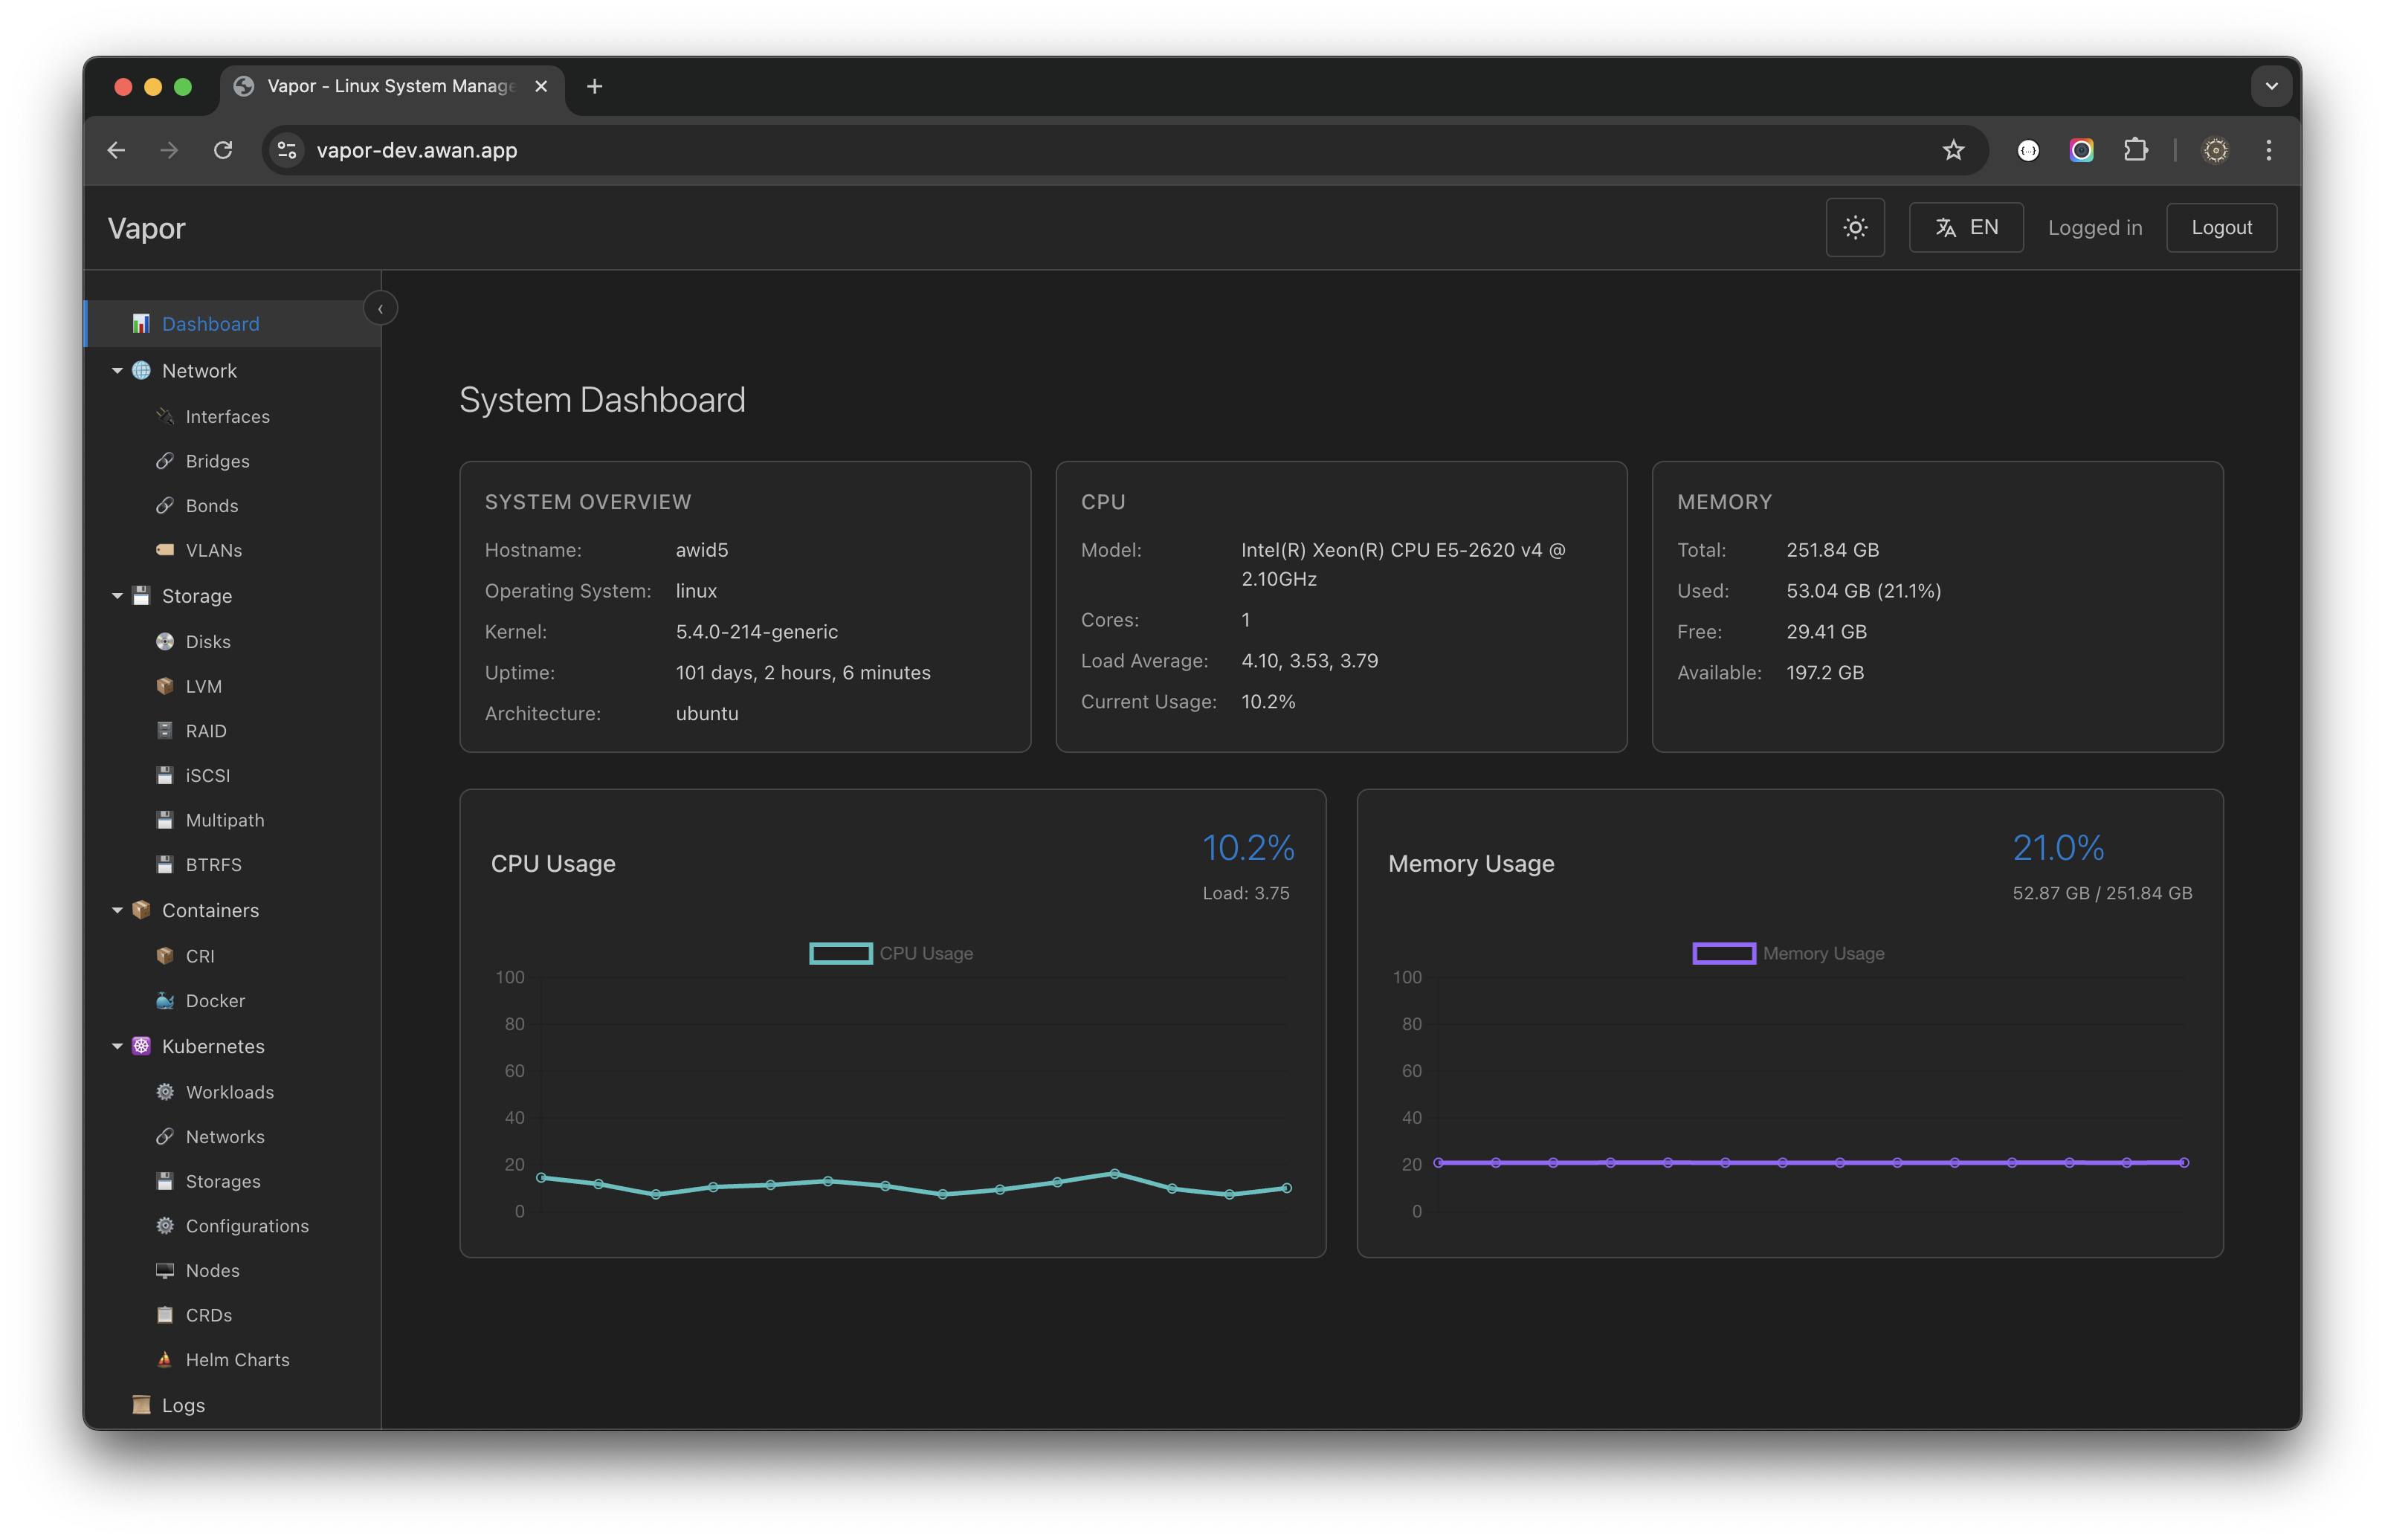
Top Bar
- Vapor Logo: Click to return to dashboard
- Theme Toggle (🌓): Switch between dark/light
- Language (🌐): Change interface language
- User Menu: Shows logged-in user and logout option
Sidebar Navigation
📊 Dashboard
🌐 Network
    ├── Interfaces
    ├── Bridges
    ├── Bonds
    └── VLANs
💾 Storage
    ├── Disks
    ├── LVM
    ├── RAID
    └── ...
📦 Containers
☸️ Kubernetes
📜 Logs
👥 Users
🖥️ Terminal
Main Content Area
- Tabbed interface for multiple views
- Breadcrumb navigation
- Context-sensitive actions
Status Bar
- Connection status
- System notifications
- Quick system stats
Security Best Practices
1. Immediate Actions
After first login, complete these security tasks:
- [ ] Verify all accounts have strong passwords
- [ ] Set strong JWT secret
- [ ] Configure firewall rules
- [ ] Enable HTTPS
- [ ] Review user accounts
- [ ] Set up audit logging
2. Password Requirements
Create strong passwords with:
- Minimum 12 characters
- Mix of uppercase and lowercase
- Numbers and special characters
- No dictionary words
- Unique for each account
3. Account Security
- Enable account lockout after failed attempts
- Configure password expiration policies
- Regular security audits
- Monitor login activity
User Roles and Permissions
Administrator Role
- Full system access
- User management
- Security configuration
- All features enabled
Standard User Role
- Limited system access
- View-only for sensitive areas
- Personal settings management
Custom Roles
Create custom roles for:
- Read-only access
- Department-specific permissions
- Service-specific management
Setting Up Additional Users
Create New Users
- Navigate to Users section
- Click Create User
- Fill in required information:
- Username
- Password
- Groups (wheel for sudo access)
- Home directory
- Save the new user
Best Practices for User Management
- One account per person
- Descriptive usernames
- Appropriate group assignments
- Regular access reviews
Configuring Two-Factor Authentication (2FA)
Enable 2FA (Recommended)
- Access user settings
- Navigate to Security tab
- Click "Enable 2FA"
- Scan QR code with authenticator app
- Enter verification code
- Save backup codes securely
Supported 2FA Methods
- TOTP (Time-based One-Time Password)
- Backup codes for recovery
- Hardware tokens (future release)
Session Management
Understanding Sessions
- Sessions use JWT tokens
- Tokens expire after configured timeout
- Activity extends session automatically
- Multiple sessions supported
Managing Active Sessions
- View active sessions in user settings
- See login time and location
- Revoke suspicious sessions
- Set session limits
Troubleshooting Login Issues
Cannot Access Login Page
Check service status:
bashsudo systemctl status vaporVerify network access:
bashcurl http://localhost:8080/healthCheck firewall:
bashsudo iptables -L | grep 8080
Authentication Failures
Verify credentials:
- Correct username/password
- Caps Lock is off
- No extra spaces
Check user exists:
bashid usernameReview logs:
bashsudo journalctl -u vapor | grep auth
Session Timeout
If logged out unexpectedly:
- Check session timeout settings
- Verify system time is correct
- Clear browser cache/cookies
- Try incognito/private mode
Browser Issues
Supported browsers:
- Chrome/Chromium 90+
- Firefox 88+
- Safari 14+
- Edge 90+
Clear browser data if experiencing issues:
- Clear cache and cookies
- Disable extensions
- Try different browser
Next Steps
Now that you're logged in:
- Explore the Dashboard: Get familiar with system metrics
- Configure Network: Set up network interfaces if needed
- Review Storage: Check disk usage and configuration
- Set Up Monitoring: Configure alerts and notifications
- Create Backups: Set up automated backups
Continue to User Interface Guide to learn about navigating Vapor effectively.